
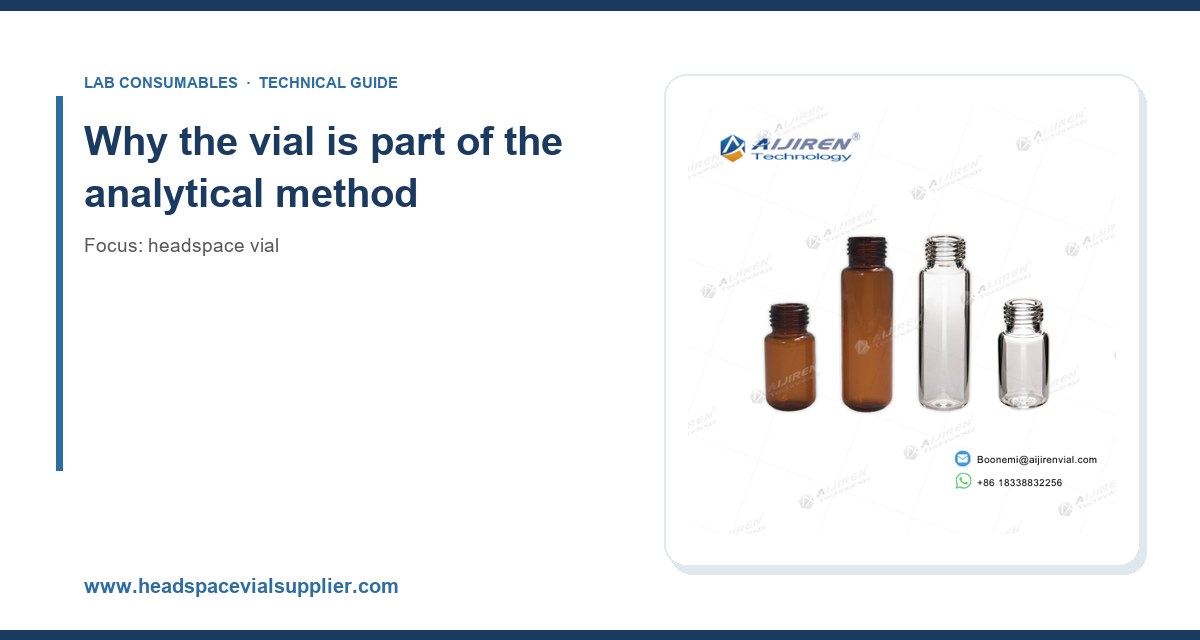
I have watched a lab spend four thousand dollars on a headspace autosampler upgrade only to discover that the new tray could not accept the 20 mm crimp caps they had standardized on three years earlier. The instrument was fine. The vials were wrong. That purchase order is what convinced me that vial selection deserves its own decision document, not a line item buried in the consumables budget. What follows is the guide I wish someone had handed me before I signed that PO.
In headspace gas chromatography, the vial is not a passive container. It is the first stage of the sample preparation, the reaction vessel, and the thermal environment that determines how much analyte reaches the loop. Change the vial, and you change the partition coefficient, the equilibration time, and sometimes the chemistry. I have seen relative standard deviations (RSD) climb from 1.8% to 6.4% on the same method simply because a purchasing manager switched to an unverified vial supplier with a different septum compound.
The physical job of a headspace vial is straightforward: hold a sample and its headspace gas at a controlled temperature, seal it against leakage at pressures up to roughly 2 bar, and allow a needle to pierce the septum cleanly, repeatedly, without coring. The chemical job is harder. The vial must not adsorb the analytes you care about, must not leach plasticizers or siloxanes into the headspace, and must survive the temperatures your method requires, typically 40 °C to 200 °C.
USP <922> and the general chapter on chromatographic methods both assume that sample containers are inert and consistent. That assumption only holds if you buy vials to a specification and verify it. The rest of this guide is about writing that specification.
Glass: the first decision that actually matters
Headspace vials come in two glass types: Type I borosilicate and Type III soda-lime. The choice is not about prestige. It is about thermal shock, chemical inertness, and how much you care about sodium and calcium leaching into your sample.
Type I borosilicate (expansion 3.3)
Type I glass has a linear coefficient of thermal expansion of about 3.3 × 10⁻⁶ /°C. It tolerates rapid heating and cooling and releases very low levels of alkali ions. For trace analysis of polar compounds, especially at the parts-per-billion level, I default to Type I. It is also the safer choice when you are heating to 150 °C or above and then cooling the vial for a second injection.
Type III soda-lime (expansion ~9.0)
Soda-lime is cheaper and perfectly adequate for many routine food, fragrance, and packaging applications where you are measuring percent-level volatiles. It leaches more sodium and calcium, and it is more sensitive to thermal shock. If your autosampler oven ramps from 40 °C to 180 °C in ten minutes and your lab runs 200 vials a day, soda-lime will eventually produce failures. I have seen hairline cracks develop at the neck after repeated cycles, and a cracked vial inside a pressurized oven is a bad afternoon.
My rule: if the method calls for oven temperatures above 120 °C, or if you are quantifying sulfur compounds, aldehydes, or trace polar analytes, specify Type I borosilicate. If you are running a screening method at 60 °C on flavor volatiles, soda-lime is defensible and saves roughly 30% on the vial line item.
Dimensions, volumes, and the autosampler interface
Headspace vials are not interchangeable across instrument platforms. The two dominant formats are the 20 mm crimp-top vial and the 18 mm screw-thread vial, and within each there are volume and height variants that matter to your tray and your needle stroke.
20 mm crimp-top vials
The classic format. Nominal volumes are 6 mL, 10 mL, and 20 mL, with 20 mL being the workhorse for most headspace GC methods. The 20 mL vial is roughly 23 × 75 mm with a 20 mm neck finish. Crimp caps use aluminum seals with a septum, and the crimping torque and crimp height determine seal integrity. A properly crimped 20 mm cap should sit with the seal skirt fully engaged and the septum flat. I use a crimper set to a consistent jaw gap and check the first five vials of every batch by hand; a loose crimp leaks, and a tight crimp can crack the neck.
The 20 mm format is what most Agilent and older PerkinElmer headspace systems were built around. If you are running a legacy instrument, this is almost certainly your format. The trade-off is that crimping is a manual, operator-dependent step, and crimper wear shows up as leakage after a few thousand vials.
18 mm screw-thread vials
Screw-thread vials eliminate the crimper. The cap is magnetic or screw-on, and the seal is made by a PTFE-faced silicone septum compressed against the neck. The 18 mm format is common on newer autosamplers and on systems where the operator is also the person loading the tray. The seal is more consistent batch to batch because there is no crimp geometry to get wrong. The downside is that the cap and septum are a single assembly, so you pay for both every time, and a cross-threaded cap is a real failure mode if operators are rushed.
Both formats are covered under the general dimensional conventions in ISO 4796 for laboratory glassware, though instrument makers add their own tolerances. Always confirm the exact neck finish and height against your autosampler’s consumable list before you commit to a pallet quantity.
Volume selection
Headspace volume matters more than total vial volume. The partition coefficient depends on the ratio of headspace to sample volume. A 20 mL vial filled with 10 mL of sample has a 10 mL headspace; the same vial filled with 2 mL has an 18 mL headspace. For a given method, changing the fill volume changes the sensitivity and the equilibration time. Standardize on a fill volume and write it into the method, then buy vials that give you that headspace consistently.
As a practical starting point: 20 mL vials with 5 mL to 10 mL of sample cover most aqueous and food matrices. For very volatile analytes where you want maximum headspace enrichment, 2 mL to 5 mL in a 20 mL vial is common. For limited sample, 10 mL vials with 2 mL to 4 mL fill are a reasonable compromise.
Septums: where most leakage and ghost-peak problems live
The septum is the part that fails. It is pierced by a needle, heated, cooled, and pierced again if the method requires re-injection. The compound, thickness, and coating determine whether you get clean chromatography or a trail of siloxane peaks.
Silicone
Bare silicone is the most common headspace septum material. It reseals well and tolerates temperatures up to about 200 °C for short exposures. The problem is that silicone can outgas low-molecular-weight siloxanes, which show up as ghost peaks in the 73, 147, and 207 m/z region if you are running GC-MS. For sensitive MS work, a PTFE-faced silicone septum is the minimum.
PTFE-faced silicone
A thin PTFE film on the sample side prevents the sample from contacting the silicone and reduces outgassing. This is my default for GC-MS and for any method where the analyte list includes compounds below m/z 100. The PTFE face also improves chemical resistance to acids and solvents.
Butyl rubber and specialty elastomers
Butyl rubber has low gas permeability and is used where you need to hold a headspace pressure for an extended equilibration or where the sample contains aggressive solvents. It is less resilient to repeated puncture, so it suits single-injection methods. Specialty fluoroelastomer septums exist for high-temperature and solvent-heavy applications, but they are expensive and you should only specify them when the method demands it.
Puncture count and reseal
A good silicone septum will reseal cleanly for 3 to 5 punctures at the same site if the needle is sharp and the septum is not overheated. Beyond that, coring and leakage become likely. If your method requires multiple injections from one vial, specify a septum rated for the count you need, and use a needle with a proper GC-style bevel. I have seen labs try to get 10 injections from a single septum and then blame the instrument for poor repeatability. The septum was the problem.
Septum thickness is typically 3 mm for 20 mm caps and about 1.5 mm to 2 mm for 18 mm screw caps. Thicker septums reseal better but are harder to pierce and can dull needles faster. Match the septum to the needle gauge your autosampler uses.
Caps, seals, and torque: the details that cause leaks
For 20 mm crimp vials, the aluminum seal is the pressure boundary. The crimp must be uniform. I set our crimpers so the seal skirt is fully rolled under the neck flange and the top is flat within about 0.2 mm. A go/no-go gauge is worth the fifty dollars; it catches worn crimper jaws before they cause a batch of leaks.
For 18 mm screw caps, torque matters. Over-tightening distorts the septum and can crack the neck; under-tightening leaks. I recommend a torque of 0.6 to 0.9 N·m for most 18 mm screw caps, checked with a small torque screwdriver on the first ten caps of a batch. The cap should be snug, not forced. If you feel the cap bottom out hard, you have probably over-compressed the septum.
Magnetic caps are common on robotic autosamplers. They must sit flat and fully engage the thread. A cap that is cross-threaded will pass a visual check and fail at pressure. Train operators to start the cap by hand for the first half turn before using the capper.
For labs that also handle liquid injection, the same sealing discipline applies to the HPLC autosampler vial, where septum choice and cap torque affect injection precision just as much. And if you are preparing standards or mobile phases alongside your headspace work, a properly graduated reagent bottle with a ground-glass or screw joint keeps contamination out of the reagents that feed the method.
Temperature ratings and thermal cycling
Every component in the vial stack has a temperature limit, and the lowest one governs. Typical numbers:
- Type I borosilicate glass: continuous service to about 500 °C, but the practical limit is the septum and cap.
- Silicone septum: about 200 °C short-term, 180 °C continuous.
- PTFE-faced silicone: about 200 °C, with better chemical resistance.
- Aluminum crimp seal: no practical limit in headspace service, but repeated heating softens the metal and reduces seal force.
- Screw cap (plastic): phenolic or PBT caps are typically rated to 140 °C to 180 °C. Check the datasheet; a cap that softens at 160 °C will leak at 170 °C.
If your method runs at 150 °C or above, specify a high-temperature cap and a PTFE-faced septum, and verify the seal at temperature with a leak test. I run a simple pressure-decay check on the first vial of every batch: pressurize to 1.5 bar, hold 30 seconds, and confirm the pressure does not drop more than 0.05 bar. It takes a minute and catches most seal problems before they become a failed run.
Chemical compatibility and inertness
Headspace analysis often involves matrices that attack the container: acidic foods, alcoholic beverages, solvents, and samples with high salt content. Glass is generally inert, but the septum and cap are not.
For acidic samples (pH below 3), avoid bare silicone and use PTFE-faced septums. For samples containing ketones or aldehydes, be aware that some septum compounds can adsorb these analytes and release them slowly, producing carryover. For sulfur compounds, the entire flow path matters, and a silanized or inert-coated vial can reduce adsorption losses. If you are quantifying trace sulfur at the low ppb level, specify an inert-treated vial and validate the recovery against a known standard.
I keep a compatibility matrix taped inside the consumables cabinet: sample type down the side, septum material across the top, with a simple pass/fail. It saves arguments and it saves reruns.
A decision checklist with concrete numbers
Use this table to narrow the choice before you talk to a supplier. The numbers are starting points, not absolutes, but they reflect what works in practice.
- Oven temperature above 120 °C: Type I borosilicate, PTFE-faced silicone septum, high-temperature cap. If above 150 °C, verify cap rating and run a leak test.
- GC-MS with analytes below m/z 100: PTFE-faced silicone septum, Type I glass, inert-treated vial if sulfur or polar compounds are present.
- Routine screening at 40 °C to 80 °C, percent-level volatiles: Type III soda-lime is acceptable; silicone septum is adequate.
- Multiple injections from one vial: septum rated for at least 5 punctures; use a fresh vial for each additional set beyond that.
- Autosampler with a 20-position tray and 20 mm format: 20 mL crimp vials, 23 × 75 mm, aluminum seals, crimp height checked with a gauge.
- Autosampler with an 18 mm screw format: 18 mm screw-thread vials, torque 0.6 to 0.9 N·m, magnetic caps if the tray requires them.
- Sample volume 5 mL to 10 mL: 20 mL vial gives a 10 mL to 15 mL headspace; confirm the method’s fill volume.
- Sample volume under 3 mL: 10 mL vial reduces headspace and improves sensitivity.
If you are standardizing across multiple instruments, the headspace vial you choose should be available in both formats with matched glass and septum specifications. That way a method transfer between a 20 mm crimp system and an 18 mm screw system does not require revalidation of the container.
Supplier qualification: what to ask before you buy
Vials are commodity items until they are not. The difference between a good supplier and a cheap one shows up in dimensional consistency, glass lot traceability, and whether they will send you a certificate of analysis with the actual measured values.
Questions I ask every new supplier
- What is the dimensional tolerance on neck diameter and height? (Look for ±0.2 mm or better on critical dimensions.)
- Is the glass Type I or Type III, and can you provide the expansion coefficient?
- What is the septum compound, thickness, and temperature rating?
- Do you provide a certificate of analysis with lot traceability?
- Can you supply pre-cleaned or silanized vials if the method requires it?
- What is the packaging format, and are the vials shipped in trays that fit my autosampler?
A supplier who cannot answer the first three questions is selling you a box, not a specification. I have also learned to ask for a sample lot and to run a side-by-side RSD comparison against my current supply before switching. Ten injections of a mid-level standard on each lot tells you more than any datasheet.
For reference methods and acceptance criteria, the U.S. EPA SW-846 test methods are a useful benchmark for volatile organics in waste and environmental matrices, and they specify container and preservation requirements that your vial selection should satisfy. Instrument vendors also publish consumable compatibility matrices; the Agilent chromatography consumables and columns pages and the Thermo Fisher chromatography and sample handling resources are good places to confirm what your platform expects. For method development notes and troubleshooting guides, the Restek technical resources are worth bookmarking.
Operational precautions on the bench
Even a correctly specified vial fails if the operator mishandles it. A few habits that have saved me reruns:
- Handle vials by the body, not the neck. Finger oils on the neck interfere with crimp sealing and with autosampler grippers.
- Inspect every vial for chips and cracks before loading. A chipped neck will crack under pressure.
- Crimp in a consistent orientation and check the first five of each batch with a gauge.
- Do not reuse crimp seals. The aluminum work-hardens and will not reseal reliably.
- Store septums in their original packaging, away from solvent vapors. A septum that has absorbed lab air will outgas in the oven.
- Equilibrate vials at the method temperature for the full specified time. Shortening equilibration to save time is the most common cause of poor repeatability I see.
If you also run liquid injections, the same discipline applies to the GC vial you use for standards and extracts; a clean, well-sealed vial is the cheapest insurance against a failed sequence.
Troubleshooting checklist
When headspace results drift, work through this list before you touch the instrument.
- Rising RSD across a batch: check septum puncture count and crimp height. Replace septums and re-crimp a test batch.
- Ghost peaks in GC-MS: switch to PTFE-faced septums, bake the oven empty, and check for septum outgassing at the method temperature.
- Low response on late vials in a tray: check for leakage at the cap and confirm the oven temperature is stable across the tray.
- Carryover between samples: increase purge time, check septum adsorption, and verify the vial is not being reused.
- Cracked vials after heating: confirm glass type and thermal ramp rate; soda-lime at high ramp rates is a common cause.
- Needle coring: check needle bevel and septum thickness; a dull needle and a thick septum together will core.
- Pressure decay on leak test: re-crimp or replace the cap, and check the septum for damage.
Nine times out of ten, the fix is a consumable, not a service call. That is the argument for keeping a small inventory of the right vials, septums, and caps on the shelf so you can swap and confirm in an hour rather than a week.
Recommendation
For most labs running headspace GC with a modern autosampler, I recommend standardizing on 20 mL Type I borosilicate vials, 23 × 75 mm, with PTFE-faced silicone septums in aluminum crimp seals, and a crimp height checked with a go/no-go gauge. If your platform uses the 18 mm screw format, use 18 mm screw-thread vials with magnetic caps torqued to 0.6 to 0.9 N·m and the same PTFE-faced septum. Set the method fill volume at 5 mL to 10 mL, equilibrate at the specified temperature for the full time, and replace septums after 3 to 5 punctures.
Buy from a supplier who provides a certificate of analysis with lot traceability and dimensional tolerances of ±0.2 mm or better. Run a ten-injection RSD comparison against your current supply before you switch. Keep a leak-test gauge and a torque screwdriver on the bench. Those three habits, specification, verification, and a small spare inventory, will do more for your headspace data quality than any instrument upgrade.
The vial is the first measurement in the method. Treat it like one.
References & further reading
Related resources from our lab consumables network:
- Headspace Vial at headspacevialsupplier.com
- Gc Vial at gcvialfactory.com
- Reagent Bottle at reagentbottleforsale.com
- Hplc Autosampler Vial at hplcautosamplervials.com
External references and standards: