
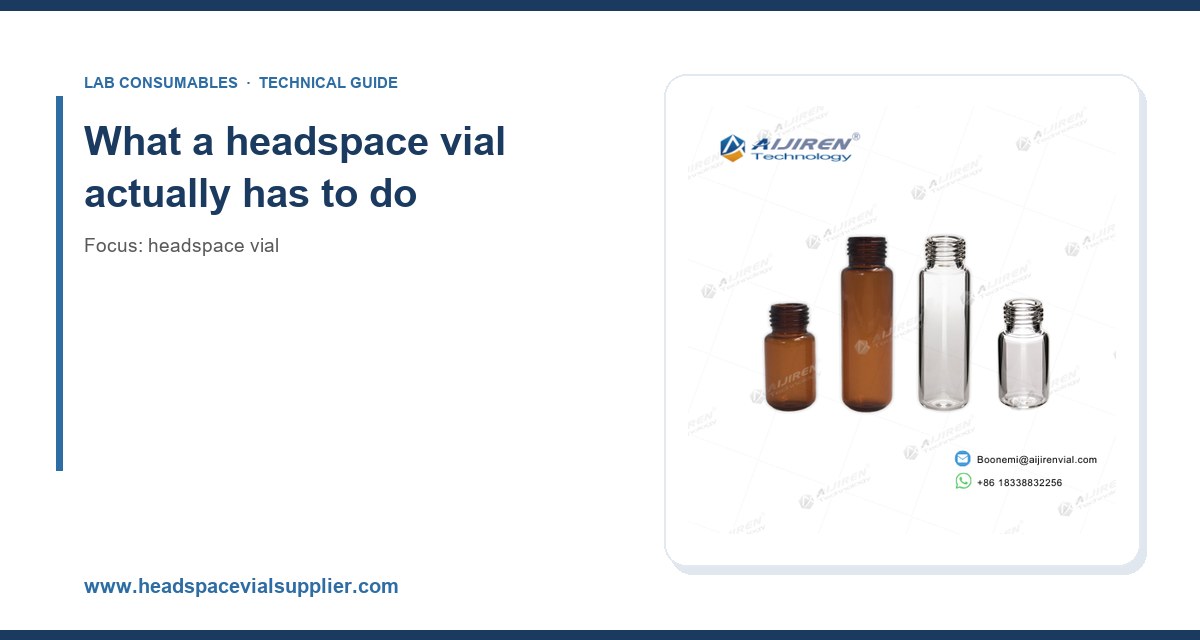
I have specified, bought, and rejected more lots of headspace vials than I care to count. The one that still bothers me was a shipment of 20 mL clear vials with 20 mm crimp finishes that looked perfect on the pallet and failed on the autosampler: the bore of the aluminum crimp caps was punched slightly off-center, and the septa leaked at 90 °C after about 40 injections. The method had been running clean for two years. The lesson is the one every buyer learns eventually: a headspace vial is a system (glass, septum, cap, crimp geometry, and the sampler’s platen), and the cheapest way to lose a batch of data is to treat it as a commodity line item.
This guide is what I would hand to a new procurement manager or lab supervisor who has to buy, qualify, and run headspace vials. It covers the glass, the septum, the seal, the dimensional standards, the temperature and pressure limits, and the failure modes that show up in real laboratories. Where numbers matter, I give the numbers I use in specifications.
Headspace sampling works by equilibrating a sample in a sealed vial at a controlled temperature, then pulling a fixed volume of the vapor above the sample into a GC. The vial is not just a container. It is a pressure vessel, a thermal chamber, and a sample-preparation vessel at the same time. If you are new to the technique, the background on Restek’s technical resources and on Agilent’s GC consumables pages is worth an afternoon because both vendors publish dimensional and compatibility data that vendors of generic glass often do not.
The vial has to do four things without compromise:
- Hold pressure. A 20 mL vial heated to 80 °C with 5 mL of an aqueous sample can see internal pressures of 1.5 to 2.5 bar depending on the matrix and the fill volume. Volatile solvents push that higher. The cap and septum have to hold that pressure for the full equilibration time and through the needle puncture.
- Stay inert. The glass and septum must not adsorb analytes, leach plasticizers, or catalyze degradation. This matters most at trace levels (ppb) and with reactive compounds such as aldehydes, sulfur species, and some amines.
- Keep its dimensions. The autosampler’s gripper, platen, and needle guide are machined to tolerances of a few tenths of a millimeter. A vial that is 0.5 mm out of spec in neck diameter or height will jam a carousel or miss the needle.
- Survive the needle. Septa are punctured repeatedly (or once, depending on the sampler). A septum that cores, tears, or fails to reseal will leak, and a leak in headspace is a silent error: the chromatogram still looks plausible.
Most of the problems I have seen in the field trace back to one of those four, and most of them are preventable at the purchasing stage.
Glass: material, color, and volume
Type I borosilicate versus Type III soda-lime
For headspace work, buy Type I borosilicate glass (USP <660> / ASTM E438 Type I) unless you have a specific reason not to. Type I has low alkali leaching, good thermal shock resistance, and a low and predictable extractables profile. Type III soda-lime vials are cheaper and fine for many routine environmental and food applications, but they leach alkali at elevated temperature and pH, and I have seen soda-lime vials show measurable sodium and silica background in ion chromatography and in some ICP-MS work. If you are running EPA SW-846 methods for volatiles, the method does not mandate Type I, but the quality control (blanks, method detection limits) is easier to hold with it.
A practical rule: for trace analysis at ppb levels, or for any method that holds samples at 80 °C or above for more than 20 minutes, specify Type I. For high-throughput screening where the analyte is at ppm and the matrix is benign, Type III is defensible.
Clear versus amber
Amber glass protects light-sensitive analytes (some vitamins, certain pesticides, and a long list of pharmaceutical actives). The trade-off is that you cannot see the sample, which matters when you are checking for foaming, phase separation, or a short fill. My preference is clear vials for method development and amber for storage and for validated methods with light-sensitive analytes. If you need both, keep them in separate, labeled carousels; mixing colors in a run is a classic source of “why is this peak different” investigations.
Volume: 10 mL, 20 mL, and 22 mL
The 20 mL vial is the workhorse and the one most autosamplers are designed around. It is the default for EPA 5021/8260 volatiles work and for most food and fragrance applications. The 10 mL vial is useful when sample is scarce or when you want a higher headspace-to-sample ratio; it also heats faster. The 22 mL vial gives a bit more headspace and is common in some European methods. The 6 mL and 4 mL sizes exist for micro-volume work and for specific samplers.
Pick the volume that matches your sampler’s platen and your method’s phase ratio. The phase ratio (headspace volume divided by sample volume) drives sensitivity and equilibration time. If you change vial size without recalculating the phase ratio, your calibration will shift. I have watched a lab “fix” a sensitivity problem by switching from 20 mL to 10 mL vials and then spend a week recalibrating because nobody updated the method.
Bottom geometry and the sample
Flat-bottom vials are standard. Round-bottom vials are used with some magnetic stirring accessories and with certain samplers. If your method uses a stir bar, check the vial’s internal bottom diameter; a stir bar that binds or tumbles will give you irreproducible equilibration. For viscous or foaming samples, a vial with a slightly larger internal diameter and a controlled fill volume reduces foam reaching the septum.
The septum is where most methods fail
If I had to pick the single component that causes the most headspace failures, it is the septum. The glass rarely fails. The cap rarely fails. The septum fails in ways that are hard to see and easy to blame on the GC.
Silicone, PTFE-faced silicone, and butyl
Silicone septa have excellent resealability and low puncture force, which is why they dominate headspace work. PTFE-faced silicone adds a chemically inert barrier on the sample side, which reduces adsorption and extractables; this is the standard choice for trace work and for reactive analytes. Butyl rubber has lower gas permeability but poorer resealability and a higher extractables profile; it shows up in some pharmaceutical applications and in vials intended for long storage. For most headspace methods, a PTFE-faced silicone septum is the right default.
Thickness matters. A 3 mm septum is the common headspace thickness and balances resealability against needle penetration force. Thinner septa (1.5 to 2 mm) puncture more easily but core and tear sooner. Thicker septa (5 mm) reseal better but need a sharper needle and higher injection force, which some autosamplers handle poorly.
Puncture counts and resealability
Vendors quote puncture counts, and the numbers are worth reading carefully. A typical 3 mm PTFE-faced silicone septum in a 20 mm crimp cap is rated for 50 to 100 punctures under moderate conditions, but the practical number depends on needle gauge, temperature, and whether the septum is punctured hot or cold. In my experience, a septum that is punctured at 80 °C with a 23-gauge needle starts to show leaks well before the rated count: I plan on 25 to 40 punctures for hot, repeated sampling and replace septa on a schedule rather than on a failure. For single-puncture samplers (many modern headspace autosamplers puncture once per vial), the septum is used once and discarded with the vial, so the puncture count is irrelevant and you should optimize for cost and inertness instead.
Needle gauge and coring
A 23-gauge needle (about 0.64 mm OD) is a common headspace needle and is gentle on septa. A 22-gauge needle (0.72 mm) is faster to fill but cores more. If you see rubber particles in the vial after injection, you have a coring problem: check needle bevel, septum thickness, and whether the needle is entering at an angle. Coring is not just cosmetic; a cored septum leaks and a particle in the sample can block the needle or contaminate the transfer line.
Septum conditioning and storage
PTFE-faced septa do not need conditioning for most methods, but silicone-only septa benefit from a bake-out at 100 to 120 °C for an hour before use if you are chasing low-level volatiles. Store septa in their original packaging, away from solvent vapors and sunlight. I have seen a box of septa left open on a bench next to a bottle of toluene pick up enough contamination to raise a baseline for a week.
Caps, crimping, and the seal
Crimp versus screw thread
Crimp caps (typically 20 mm aluminum) give the most reliable seal for headspace because the crimp deforms the cap skirt around the vial finish and compresses the septum evenly. The trade-off is that crimping is a skill: an over-crimped cap crushes the septum and can crack the neck; an under-crimped cap leaks. Screw-thread caps (often 18 mm or 20 mm) are easier to apply by hand and are common in some autosamplers, but the seal depends on the cap’s liner and the torque, and they are more sensitive to operator technique.
For high-throughput validated methods, I default to 20 mm crimp with a calibrated crimper. For method development, short runs, or labs without a crimper, screw-thread vials are a reasonable compromise.
Crimp dimensions and torque
The 20 mm crimp finish follows a de facto industry geometry (the “20 mm headspace” standard, with a neck OD around 20.0 mm and a specific crimp groove). The cap skirt height and the crimp jaw setting determine the seal. A properly crimped cap has a uniform, symmetric skirt with no sharp edges and no visible deformation of the septum. I check crimper settings against a go/no-go gauge at the start of every shift and after every jaw change.
For screw-thread caps, torque matters. A typical 18 mm screw cap with a PTFE-faced silicone liner seals reliably at 1.0 to 1.5 N·m; below that you risk leaks, above that you deform the liner and can crack the neck. Use a torque wrench or a calibrated capping tool, and check a few caps per batch by hand: a cap that spins freely is under-torqued.
GPI and ISO references
The glass finish dimensions are standardized. The GPI (Glass Packaging Institute) finish specifications and the corresponding ISO 4796 laboratory glassware standards define neck diameters, thread pitch, and tolerances. When you write a purchase specification, reference the GPI/ISO finish number and the dimensional tolerances, not just “20 mm crimp.” That single line has saved me more arguments with suppliers than any other clause.
Temperature, pressure, and chemical compatibility
Thermal limits
Type I borosilicate glass handles the temperatures used in headspace (typically 40 to 150 °C) with margin. The limiting components are the septum and the cap. Silicone septa are rated to about 200 °C but degrade faster above 150 °C; PTFE-faced silicone is similar. Aluminum caps are fine to well above headspace temperatures. The practical ceiling for routine work is 120 to 150 °C; above that, check the septum’s published continuous-use temperature and expect shorter septum life.
Pressure and fill volume
Internal pressure scales with temperature and with the fraction of the vial that is liquid. A 20 mL vial with 5 mL of aqueous sample at 80 °C is comfortable. A 20 mL vial with 15 mL of a volatile solvent at 80 °C is not; the pressure can exceed the cap’s seal and the septum can lift. Keep the liquid volume at or below 50 percent of the vial volume for aqueous matrices and lower for volatile organic matrices. If your method calls for a high fill, use a pressure-rated cap and a thicker septum, and validate the seal at the method temperature.
Chemical compatibility
PTFE is resistant to almost everything you will put in a headspace vial. Silicone is less resistant to nonpolar solvents and to some acids. If your sample contains a solvent that swells silicone (toluene, xylene, some chlorinated solvents), use a PTFE-faced septum and keep the liquid off the septum. If you are working with strong bases at elevated temperature, Type I glass is the right choice and you should check the cap’s coating; some aluminum caps have a protective lacquer that is not base-resistant.
A selection checklist with numbers
Here is the checklist I use when specifying a headspace vial for a new method. It is deliberately numeric because “high quality” is not a purchase specification.
- Volume: 20 mL for standard methods and most autosamplers; 10 mL when sample is limited or a higher phase ratio is wanted; 22 mL for methods that specify it.
- Glass: Type I borosilicate (USP <660>) for trace work and temperatures ≥80 °C; Type III acceptable for ppm-level routine work.
- Color: clear for development and visual checks; amber for light-sensitive analytes and storage.
- Finish: 20 mm crimp for validated high-throughput methods; 18 or 20 mm screw thread where a crimper is impractical.
- Septum: 3 mm PTFE-faced silicone as the default; silicone-only for methods that need maximum resealability and can tolerate extractables; butyl only where low gas permeability is required.
- Puncture plan: replace septa every 25 to 40 hot punctures with a 23-gauge needle; single-use for one-puncture samplers.
- Crimp: calibrated crimper, go/no-go gauge at shift start, uniform skirt, no septum deformation.
- Screw torque: 1.0 to 1.5 N·m for 18 mm caps with PTFE-faced liners.
- Fill volume: ≤50 percent of vial volume for aqueous matrices; lower for volatile organics.
- Temperature: method temperature within septum’s continuous rating; expect shorter septum life above 150 °C.
- Documentation: certificate of analysis with dimensional data, glass type, and septum lot; reference GPI/ISO finish in the spec.
If you are buying across a portfolio of methods, it helps to standardize on one or two vial configurations and one septum type. Fewer part numbers means fewer qualification studies, fewer training errors, and better pricing. The headspace vial range at Headspace Vial Supplier is organized this way, and it is worth comparing the dimensional drawings against your sampler’s specification before you commit to a volume.
Operational precautions that prevent most failures
Before the run
Check the crimper or capping tool at the start of every shift. Inspect a sample of caps for skirt symmetry. Confirm the septum lot matches the method’s validation. Verify the fill volume with a calibrated dispenser; a 10 percent overfill on a volatile matrix is enough to change the pressure and the phase ratio. And check that the vial fits the platen without force: a vial that needs a push is out of dimensional spec, and it will jam eventually.
During the run
Watch the first few injections of a new lot. A leaking septum often shows as a lower response for early-eluting compounds and a drifting internal standard. If your method uses an internal standard, plot the IS response across the run; a downward trend is a seal problem, not a detector problem. Keep the autosampler’s needle guide clean; a bent needle cores septa and causes leaks that look like method drift.
After the run
Discard single-use vials and septa. For reusable hardware (caps, if your lab reuses them), inspect for deformation and discard any cap with a distorted skirt. Log the septum lot and the number of punctures so you can correlate failures with lots. I keep a simple spreadsheet: lot number, date in service, method, temperature, and any QC failures. It has caught two bad septum lots in five years, which paid for the record-keeping many times over.
Troubleshooting checklist
When headspace results go wrong, work through this list in order. It covers the failures I have actually seen, with the numbers that usually identify them.
- Low response, drifting internal standard: suspect a leaking septum or under-crimped cap. Check crimp symmetry and septum condition; replace septa and re-run a calibration check.
- Rubber particles in the vial or a blocked needle: coring. Check needle bevel and septum thickness; switch to a 23-gauge needle or a thinner septum.
- Ghost peaks or rising baseline: septum extractables or contaminated septa. Bake out new septa at 100 to 120 °C, check storage conditions, and consider a PTFE-faced septum.
- Poor reproducibility (RSD > 10 percent on replicates): check fill volume, equilibration time, and vial dimensional consistency. Measure neck OD and height on a sample of vials with calipers; a 0.5 mm spread is enough to cause trouble.
- Vial jams or needle misses: dimensional nonconformance. Compare against the GPI/ISO finish drawing and the sampler’s vial specification; reject the lot if out of tolerance.
- Pressure-related leaks at high temperature: reduce fill volume, lower the method temperature, or use a pressure-rated cap and thicker septum.
- Analyte loss or adsorption: check septum facing (PTFE side to sample), glass type, and whether the vial was silanized when the method requires it.
- Cracked necks: over-crimping or thermal shock. Recalibrate the crimper and pre-warm vials gradually if moving from cold storage to a hot oven.
For method-specific guidance, the vendor technical libraries are more useful than generic advice. Thermo Fisher’s chromatography and sample handling pages cover sampler-specific vial requirements, and the EPA SW-846 methods give the QC criteria that tell you whether a vial problem is actually affecting your data.
Adjacent consumables and why they matter to vial selection
Headspace vials do not live in isolation. The same lab usually runs liquid injections on the same GC or on an adjacent system, and the consumables need to be consistent. If you are standardizing glassware across a lab, it is worth looking at the GC vial range for autosampler vials and the HPLC autosampler vial range for liquid chromatography, because dimensional standards and septum chemistries overlap. For sample preparation and storage, reagent bottles with the same glass type and closure standards reduce the number of variables when you are tracking down a contamination issue.
The practical point: buy from a supplier who can document glass type, dimensional tolerances, and septum lot chemistry across the whole range. A mixed supply chain with no documentation is where trace-level methods go to die.
Cost, lead time, and the total cost of a bad lot
Headspace vials are inexpensive per unit, which is exactly why buyers underweight them. A bad lot does not cost you the price of the vials. It costs you the run, the re-run, the investigation, and sometimes the method’s reputation with a client. I have seen a single out-of-spec lot of 5,000 vials trigger a week of rework on a validated environmental method. The vials were maybe a few hundred dollars. The labor was five figures.
When you compare quotes, compare the certificate of analysis, the dimensional data, and the septum lot documentation, not just the unit price. Ask for a sample lot and run a dimensional check with calipers on 20 vials: neck OD, height, and bore concentricity. Ask for the septum’s continuous-use temperature and its puncture rating at your method temperature. A supplier who cannot answer those questions is not a supplier for a validated method.
Takeaway
Choose the headspace vial by the method, not by the catalog photo: Type I borosilicate glass for trace work and temperatures at or above 80 °C, a 20 mL vial with a 20 mm crimp finish for validated high-throughput methods, a 3 mm PTFE-faced silicone septum as the default, a calibrated crimper checked every shift, fill volume at or below 50 percent for aqueous matrices, and a septum replacement schedule of 25 to 40 hot punctures with a 23-gauge needle. Write the GPI/ISO finish and the dimensional tolerances into the purchase specification, require a certificate of analysis with every lot, and keep a lot log. The vial is the cheapest part of the method and the easiest place to lose the run.
References & further reading
Related resources from our lab consumables network:
- Headspace Vial at headspacevialsupplier.com
- Gc Vial at gcvialfactory.com
- Reagent Bottle at reagentbottleforsale.com
- Hplc Autosampler Vial at hplcautosamplervials.com
External references and standards: